How to draw an electrical plan?
Master the art of creating a functional and safe electrical plan with our comprehensive guide. This article walks you through the essentials of drawing an electrical plan, including key design tips and free templates to kickstart your project. Perfect for architects and interior designers aiming to deliver top-tier electrical layouts that align with their design vision and ensure seamless installation.

Creating a precise electrical plan is essential for any interior design or architectural project, ensuring that a building’s electrical system is safe, functional, and tailored to its occupants' needs. Electrical plans detail the location of outlets, switches, fixtures, and the wiring path, helping electricians and contractors bring your design to life without costly modifications. In this article, we’ll break down what an electrical plan is, explain how to create one step-by-step, and provide valuable design tips and two free templates to get started quickly.
Prefer videos to reading? Watch our tutorial on creating a lighting and electrical plan:
1. What is an electrical plan?
An electrical plan is a technical drawing that specifies the layout of electrical components within a space. This includes power outlets, lighting fixtures, switches, and circuits, as well as the pathways for electrical wiring. Electrical plans are essential for:
- Ensuring safety and compliance: Electrical plans help prevent potential hazards by adhering to building codes and safety standards.
- Enhancing functionality: Thoughtfully placed outlets and switches enhance the convenience and usability of a space.
- Facilitating installation: Electrical plans guide electricians, showing them exactly where and how to install wiring and components.

In short, an electrical plan is crucial for balancing aesthetics, functionality, and safety in a space’s electrical system.
2. How to draw an electrical plan?
Creating an effective electrical plan involves understanding the room’s purpose, layout, and the specific needs of its occupants. Here’s a guide on how to draw an electrical plan, along with key elements to include.
Key elements to include:
- Outlets and power sources: Mark all outlets, including general power outlets, dedicated appliance outlets, and any USB ports. Common locations include near beds, desks, countertops, and seating areas. Kitchens, for instance, require a higher number of outlets for appliances.
- Switches and control points: Place switches strategically for easy access and control over lighting and appliances. Group switches together when possible, and consider including dimmer switches in living rooms, dining areas, and bedrooms to adjust lighting levels.
- Lighting fixtures: Show the location of ceiling lights, wall sconces, pendant lights, and other fixtures. Label each type for clarity, ensuring they align with the room’s layout and lighting needs.

- Wiring and circuit pathways: Indicate the pathway of electrical wiring, showing how it connects outlets, switches, and fixtures. Ensure that each circuit has a clear and logical layout to avoid overloading.
- Dedicated circuits for heavy appliances: In areas like the kitchen, indicate separate circuits for high-demand appliances (e.g., ovens, refrigerators, microwaves). This ensures that these devices don’t overload the main circuit.
- Annotations and dimensions: Include notes for specific electrical requirements (e.g., voltage) and dimensions for outlet heights or switch placements. These details help electricians install components accurately.
Steps to create your electrical plan
- Start with a floor plan base: Use a base floor plan to guide the placement of outlets, switches, and wiring. Ensure that all components align with the layout of furniture and appliances.
- Position outlets strategically: Place outlets where they’ll be most convenient, such as near workspaces in the kitchen, by seating in the living room, or beside the bed. Consider the room’s function to determine the number and type of outlets.
- Plan switch locations: Place switches at entry points and areas where they can control multiple lighting zones if needed. Avoid placing switches in hard-to-reach areas, and consider switch height for accessibility.
- Add lighting fixture locations: Mark the positions of each lighting fixture, taking into account the function of each area. In the kitchen, place fixtures above work surfaces; in the living room, position them for ambient lighting over seating areas.
- Connect with wiring and circuits: Draw lines to indicate the wiring path, grouping outlets and fixtures into circuits. Make sure that heavy-duty appliances have dedicated circuits, and that the wiring follows a logical path.
- Review and refine: Go over the plan to ensure everything is logically arranged and meets code requirements. Refine the layout as needed to optimize convenience and functionality.
3. Design and technical recommendations
For a safe and efficient electrical plan, keep these recommendations in mind:
- Follow code requirements: Electrical plans must comply with local building codes for safety and functionality. Ensure that circuit capacity, outlet spacing, and switch placement adhere to regulations.
- Plan for convenience: Position outlets and switches for easy access, especially in frequently used spaces. In the kitchen, outlets should be near countertops, while in the living room, place outlets near seating for charging devices.
- Separate lighting zones: Consider using separate circuits for different lighting zones, allowing for independent control. For example, the kitchen might have separate circuits for task lighting and ambient lighting.
- Ensure proper load distribution: Avoid overloading circuits by distributing outlets, fixtures, and heavy appliances across multiple circuits. Use dedicated circuits for high-demand appliances.
- Consider future needs: Anticipate future needs by adding extra outlets or wiring for potential upgrades. This is especially helpful in living rooms or kitchens, where technology and appliances may change over time.
- Plan for energy efficiency: Include energy-efficient lighting options such as LEDs and consider the use of dimmers to reduce energy consumption.
- Double-check outlet heights: Especially in kitchens, bathrooms, and other wet areas, ensure outlets are at a safe height and away from potential water exposure.
4. Common errors to avoid when drawing an electrical plan
To ensure a well-designed and safe electrical plan, watch out for these common mistakes:
- Overloading circuits: Avoid connecting too many outlets or fixtures to a single circuit, which can cause circuit breakers to trip frequently and create safety risks.
- Incorrect outlet placement: Placing outlets too close to water sources or in inaccessible areas can create safety issues and inconvenience. Always consider the room’s layout when positioning outlets.
- Inadequate lighting control: Forgetting to add separate switches for different lighting zones reduces flexibility. Consider the room’s functions and provide independent controls for each zone.
- Ignoring accessibility: Switches and outlets should be easily accessible. Avoid placing switches too high or low, and ensure they’re reachable for all occupants.
- Underestimating future needs: Failing to plan for additional devices or appliances can lead to inadequate electrical capacity. Add extra outlets and consider wiring for potential upgrades.
- Not labeling circuits: A lack of clear circuit labeling can lead to confusion during installation and maintenance. Label circuits to indicate which outlets, switches, and fixtures they control.
5. Free electrical plan templates to get started faster
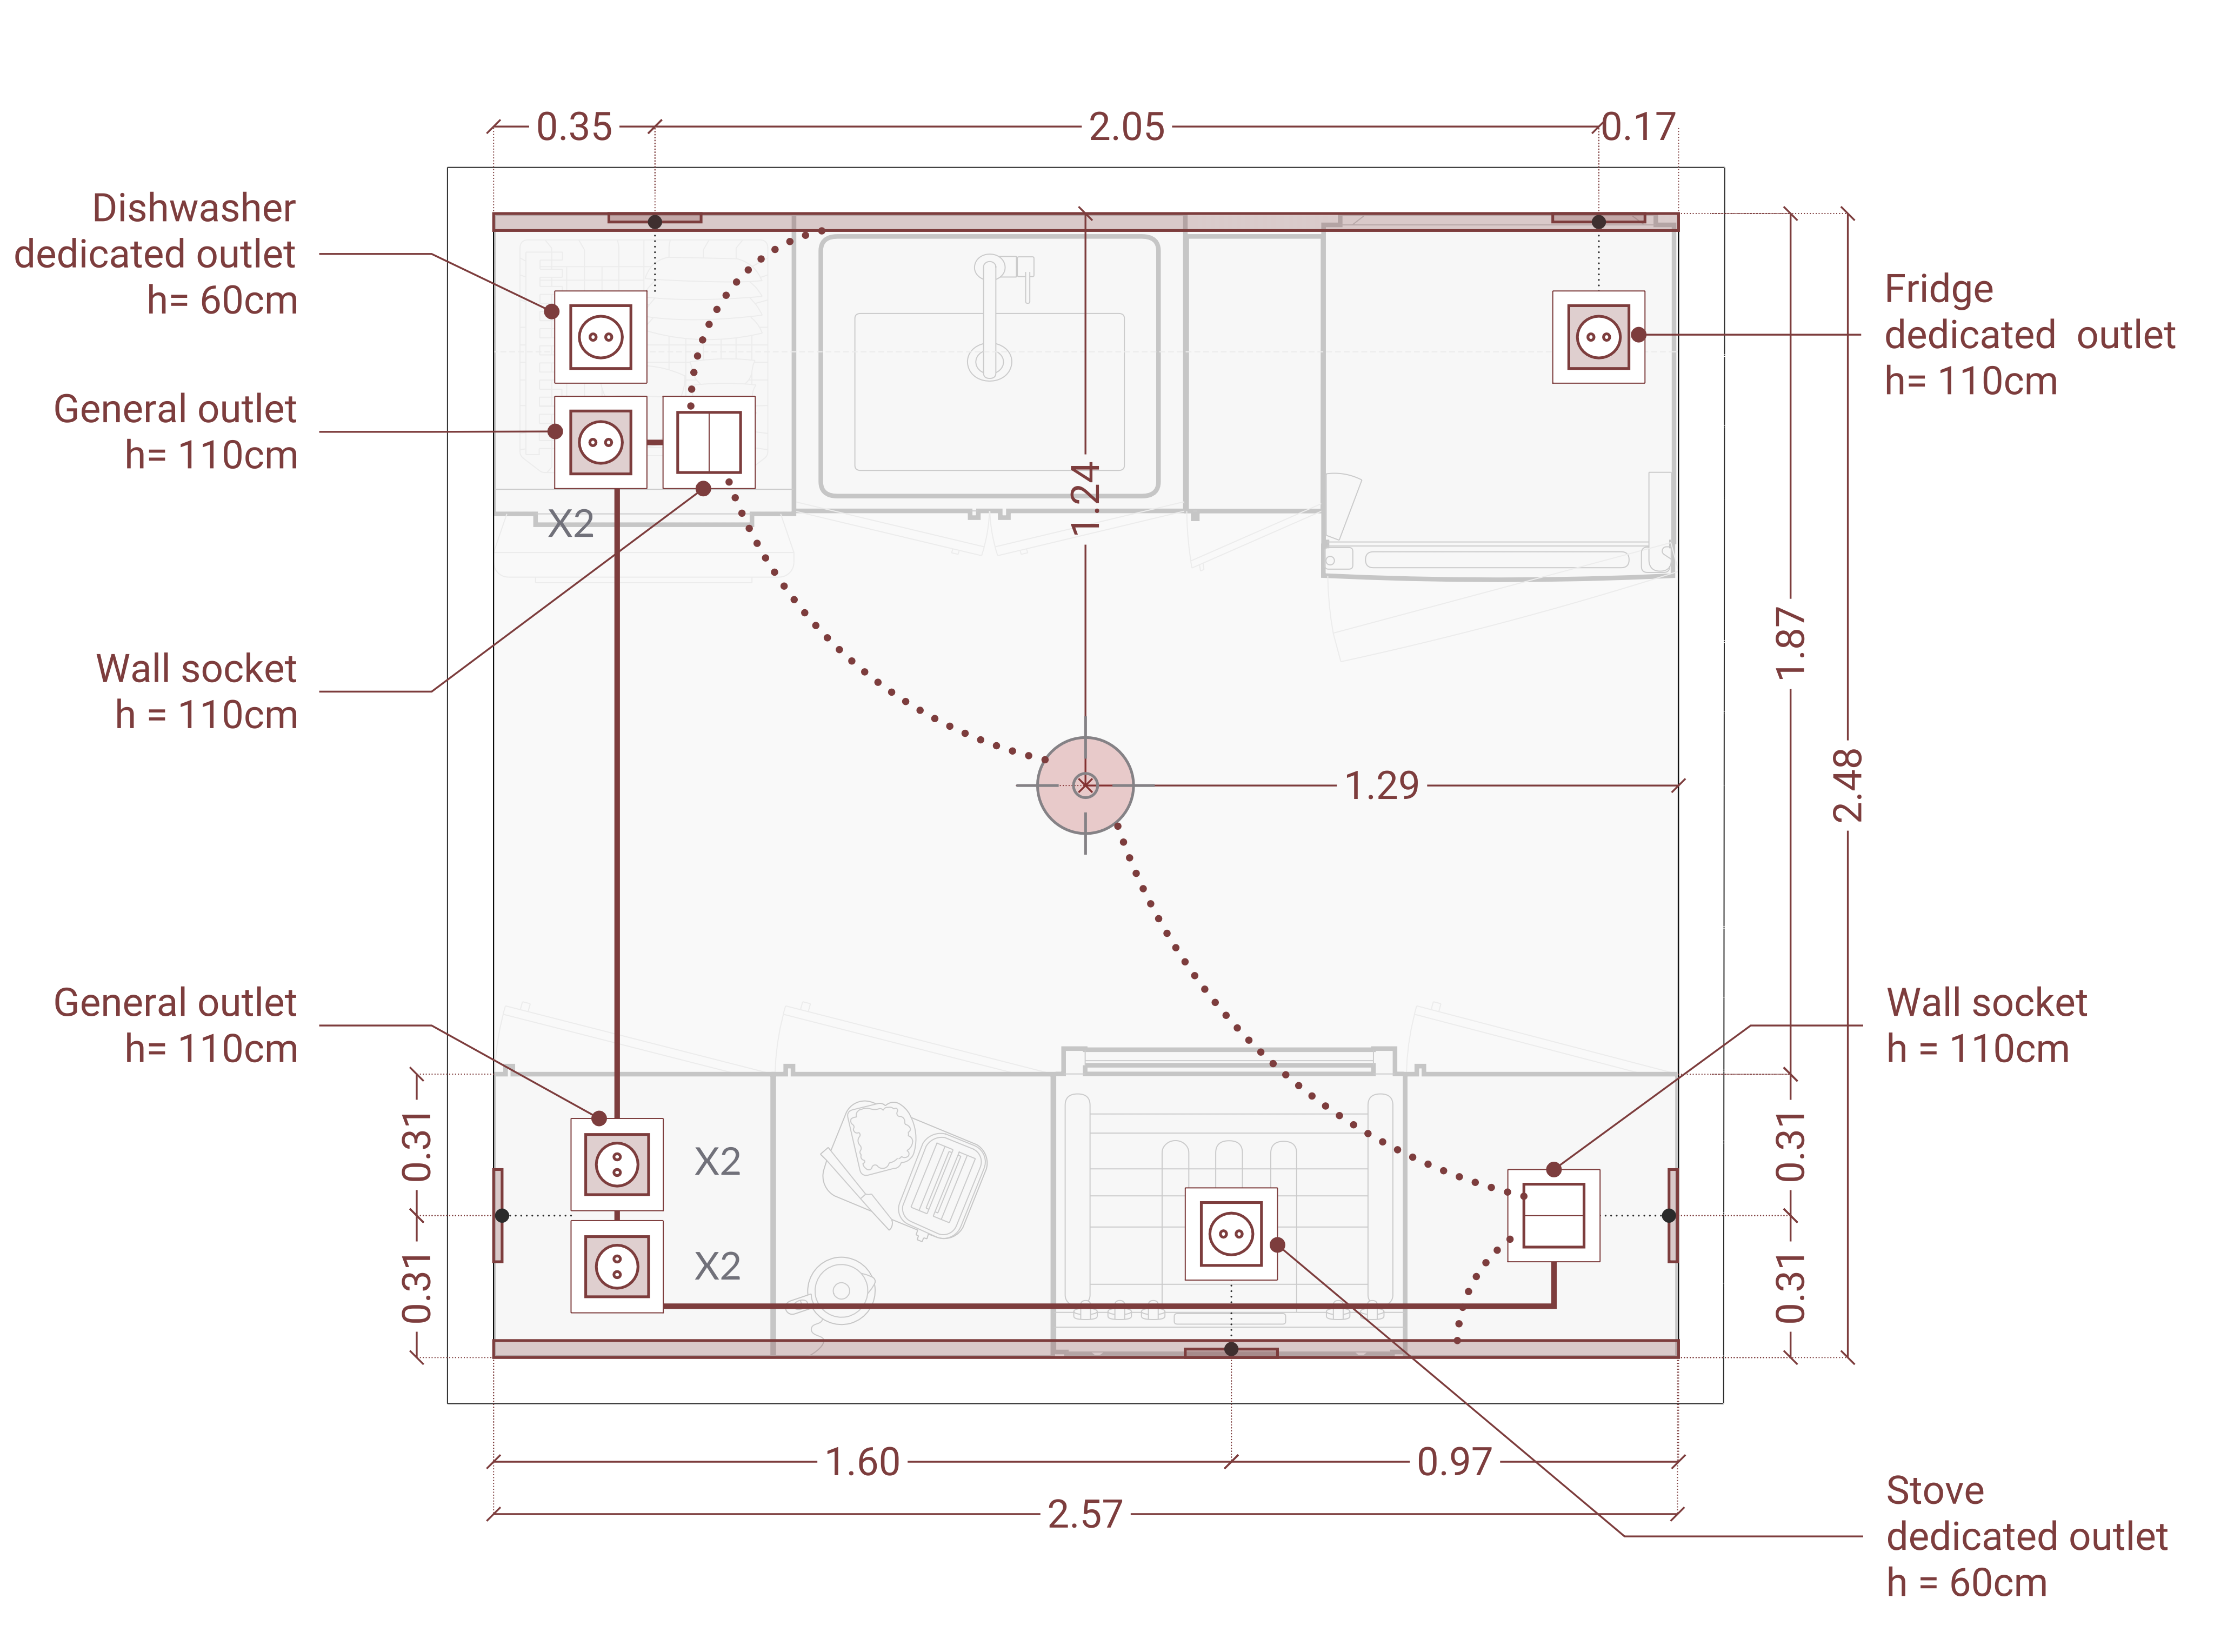
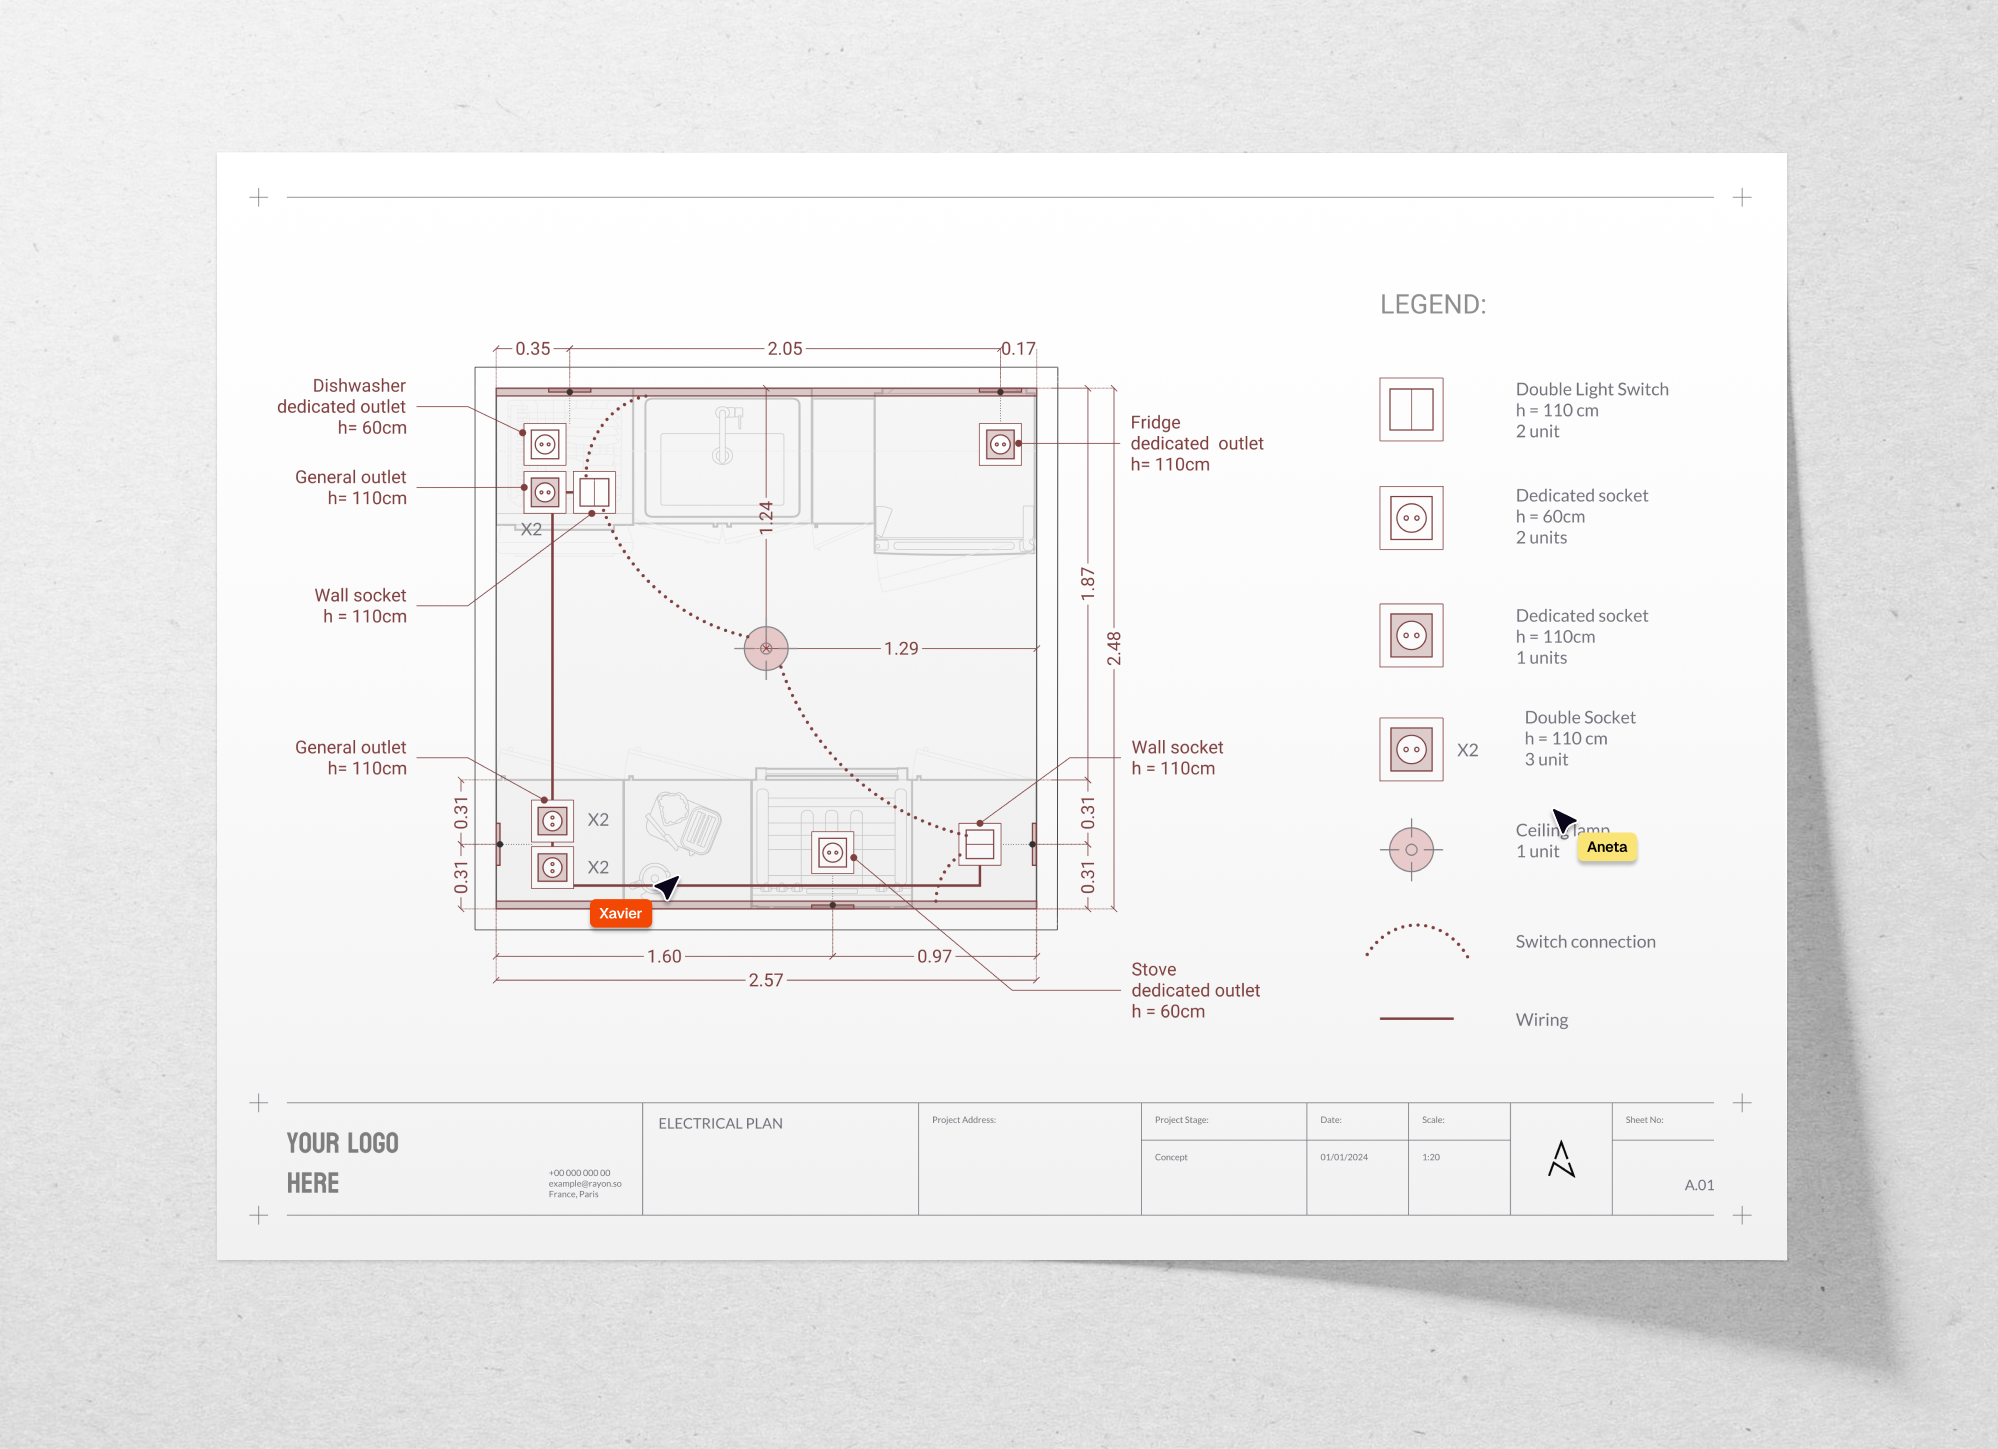
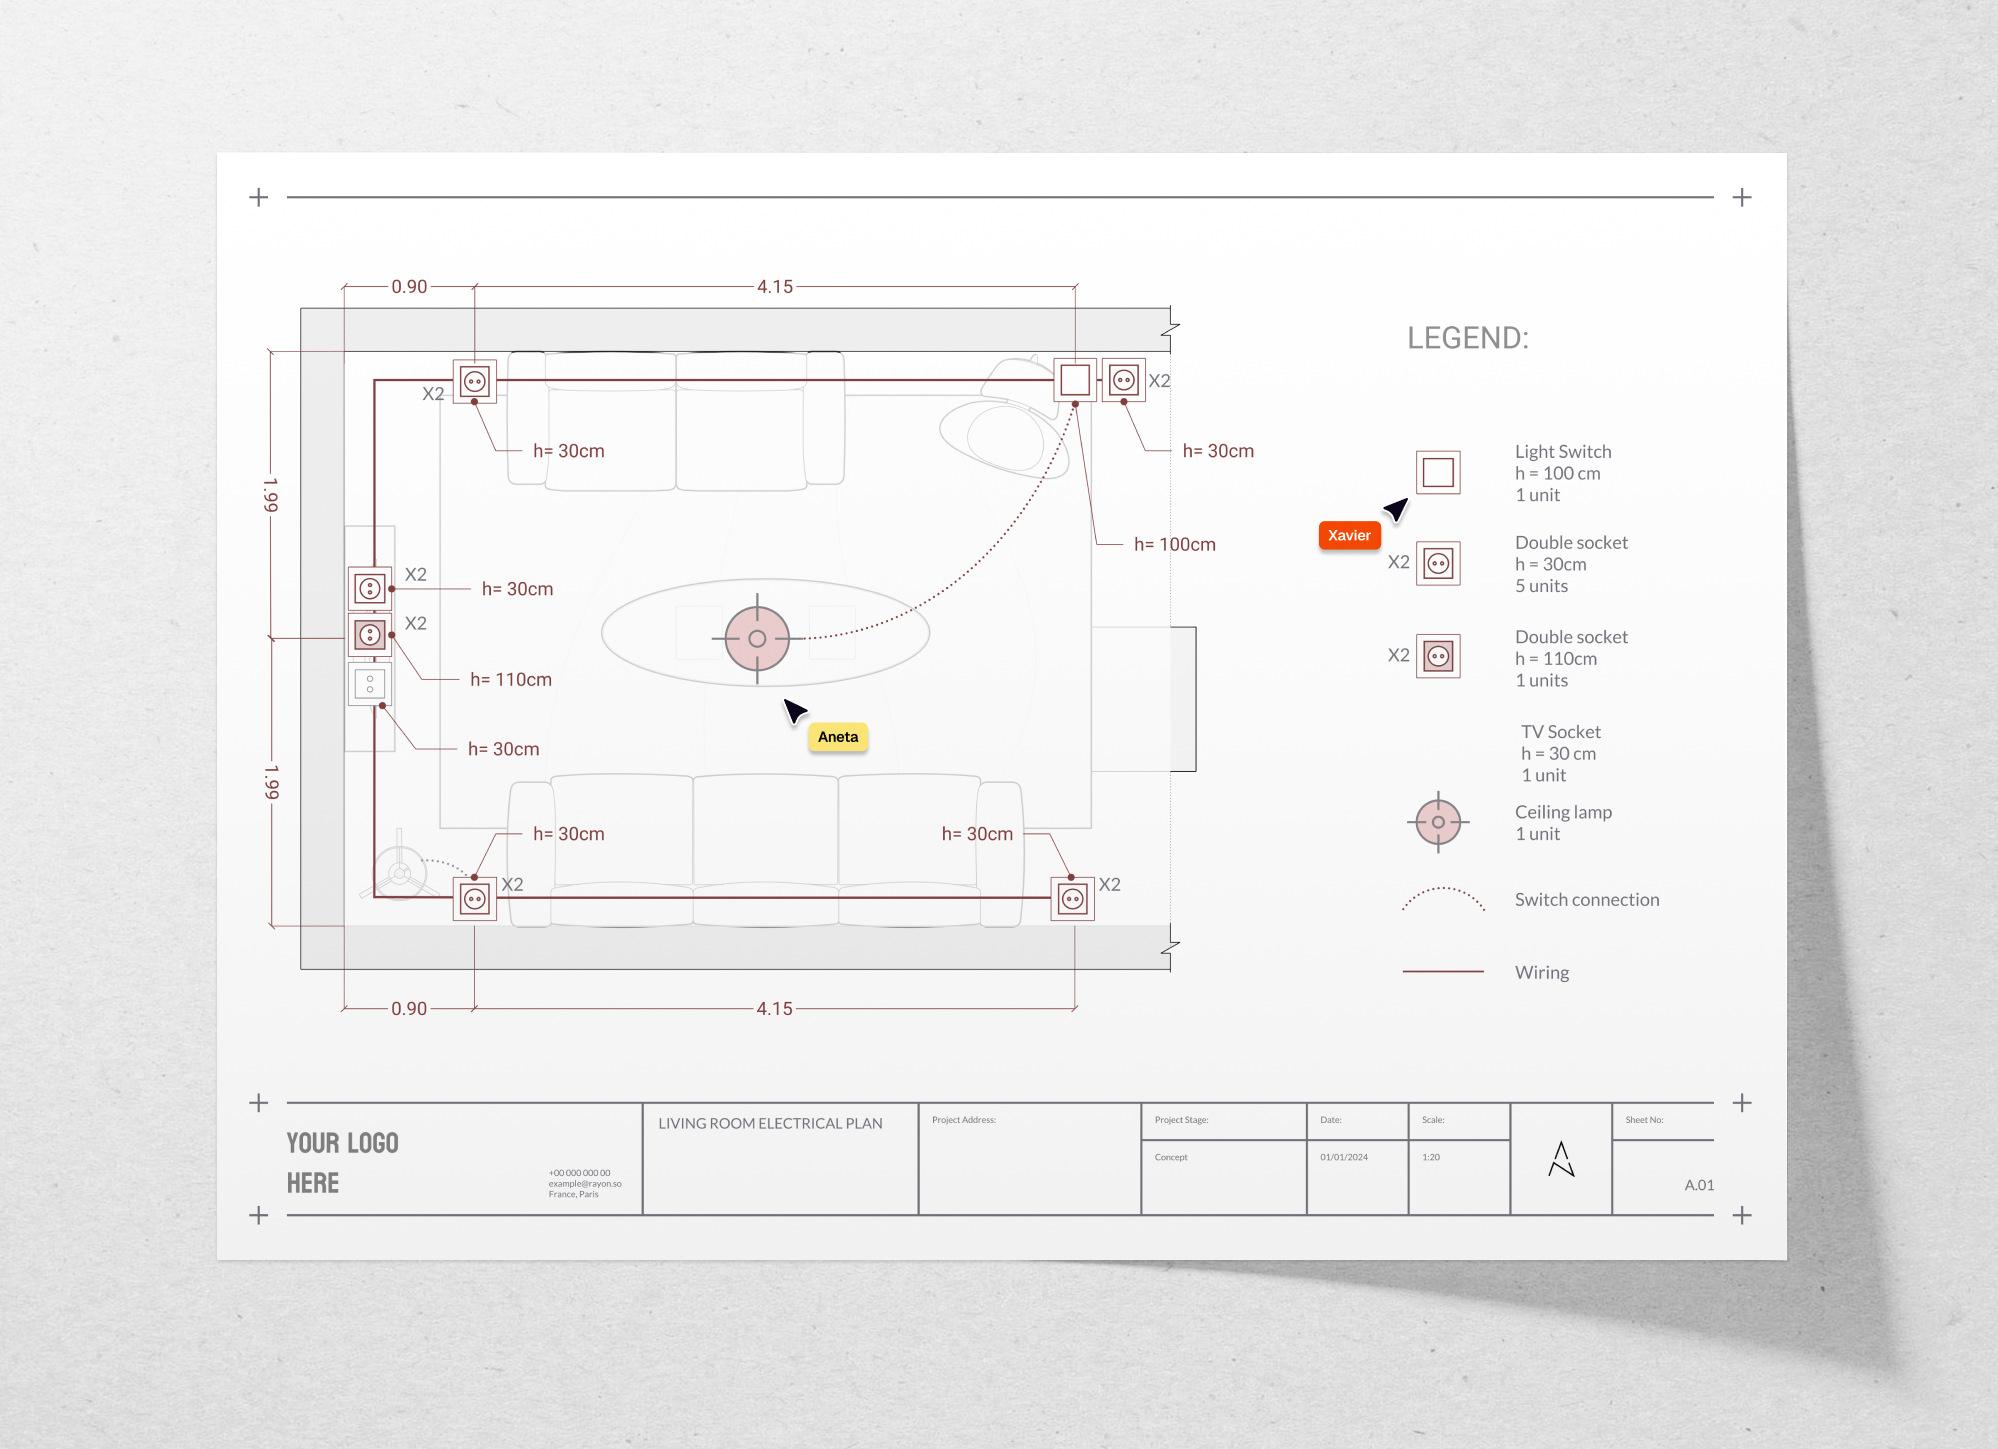
To streamline your electrical planning, we’ve provided two free templates: one for a kitchen electrical plan and another for a living room electrical plan. These templates are designed to help you visualize and create a professional electrical layout with minimal setup.
Kitchen electrical plan template
- Features: Includes dedicated circuits for major appliances (oven, refrigerator, microwave), power outlets along countertops, and lighting fixtures over workspaces.
- Applications: Use this template to plan a functional and efficient kitchen electrical layout that meets code requirements and enhances usability.
Living room electrical plan template
- Features: Showcases outlet placement around seating areas, dedicated circuits for media equipment, and flexible lighting zones for ambient and accent lighting.
- Applications: Perfect for creating a comfortable and convenient living room layout, this template ensures outlets and lighting are optimized for relaxation and entertainment.
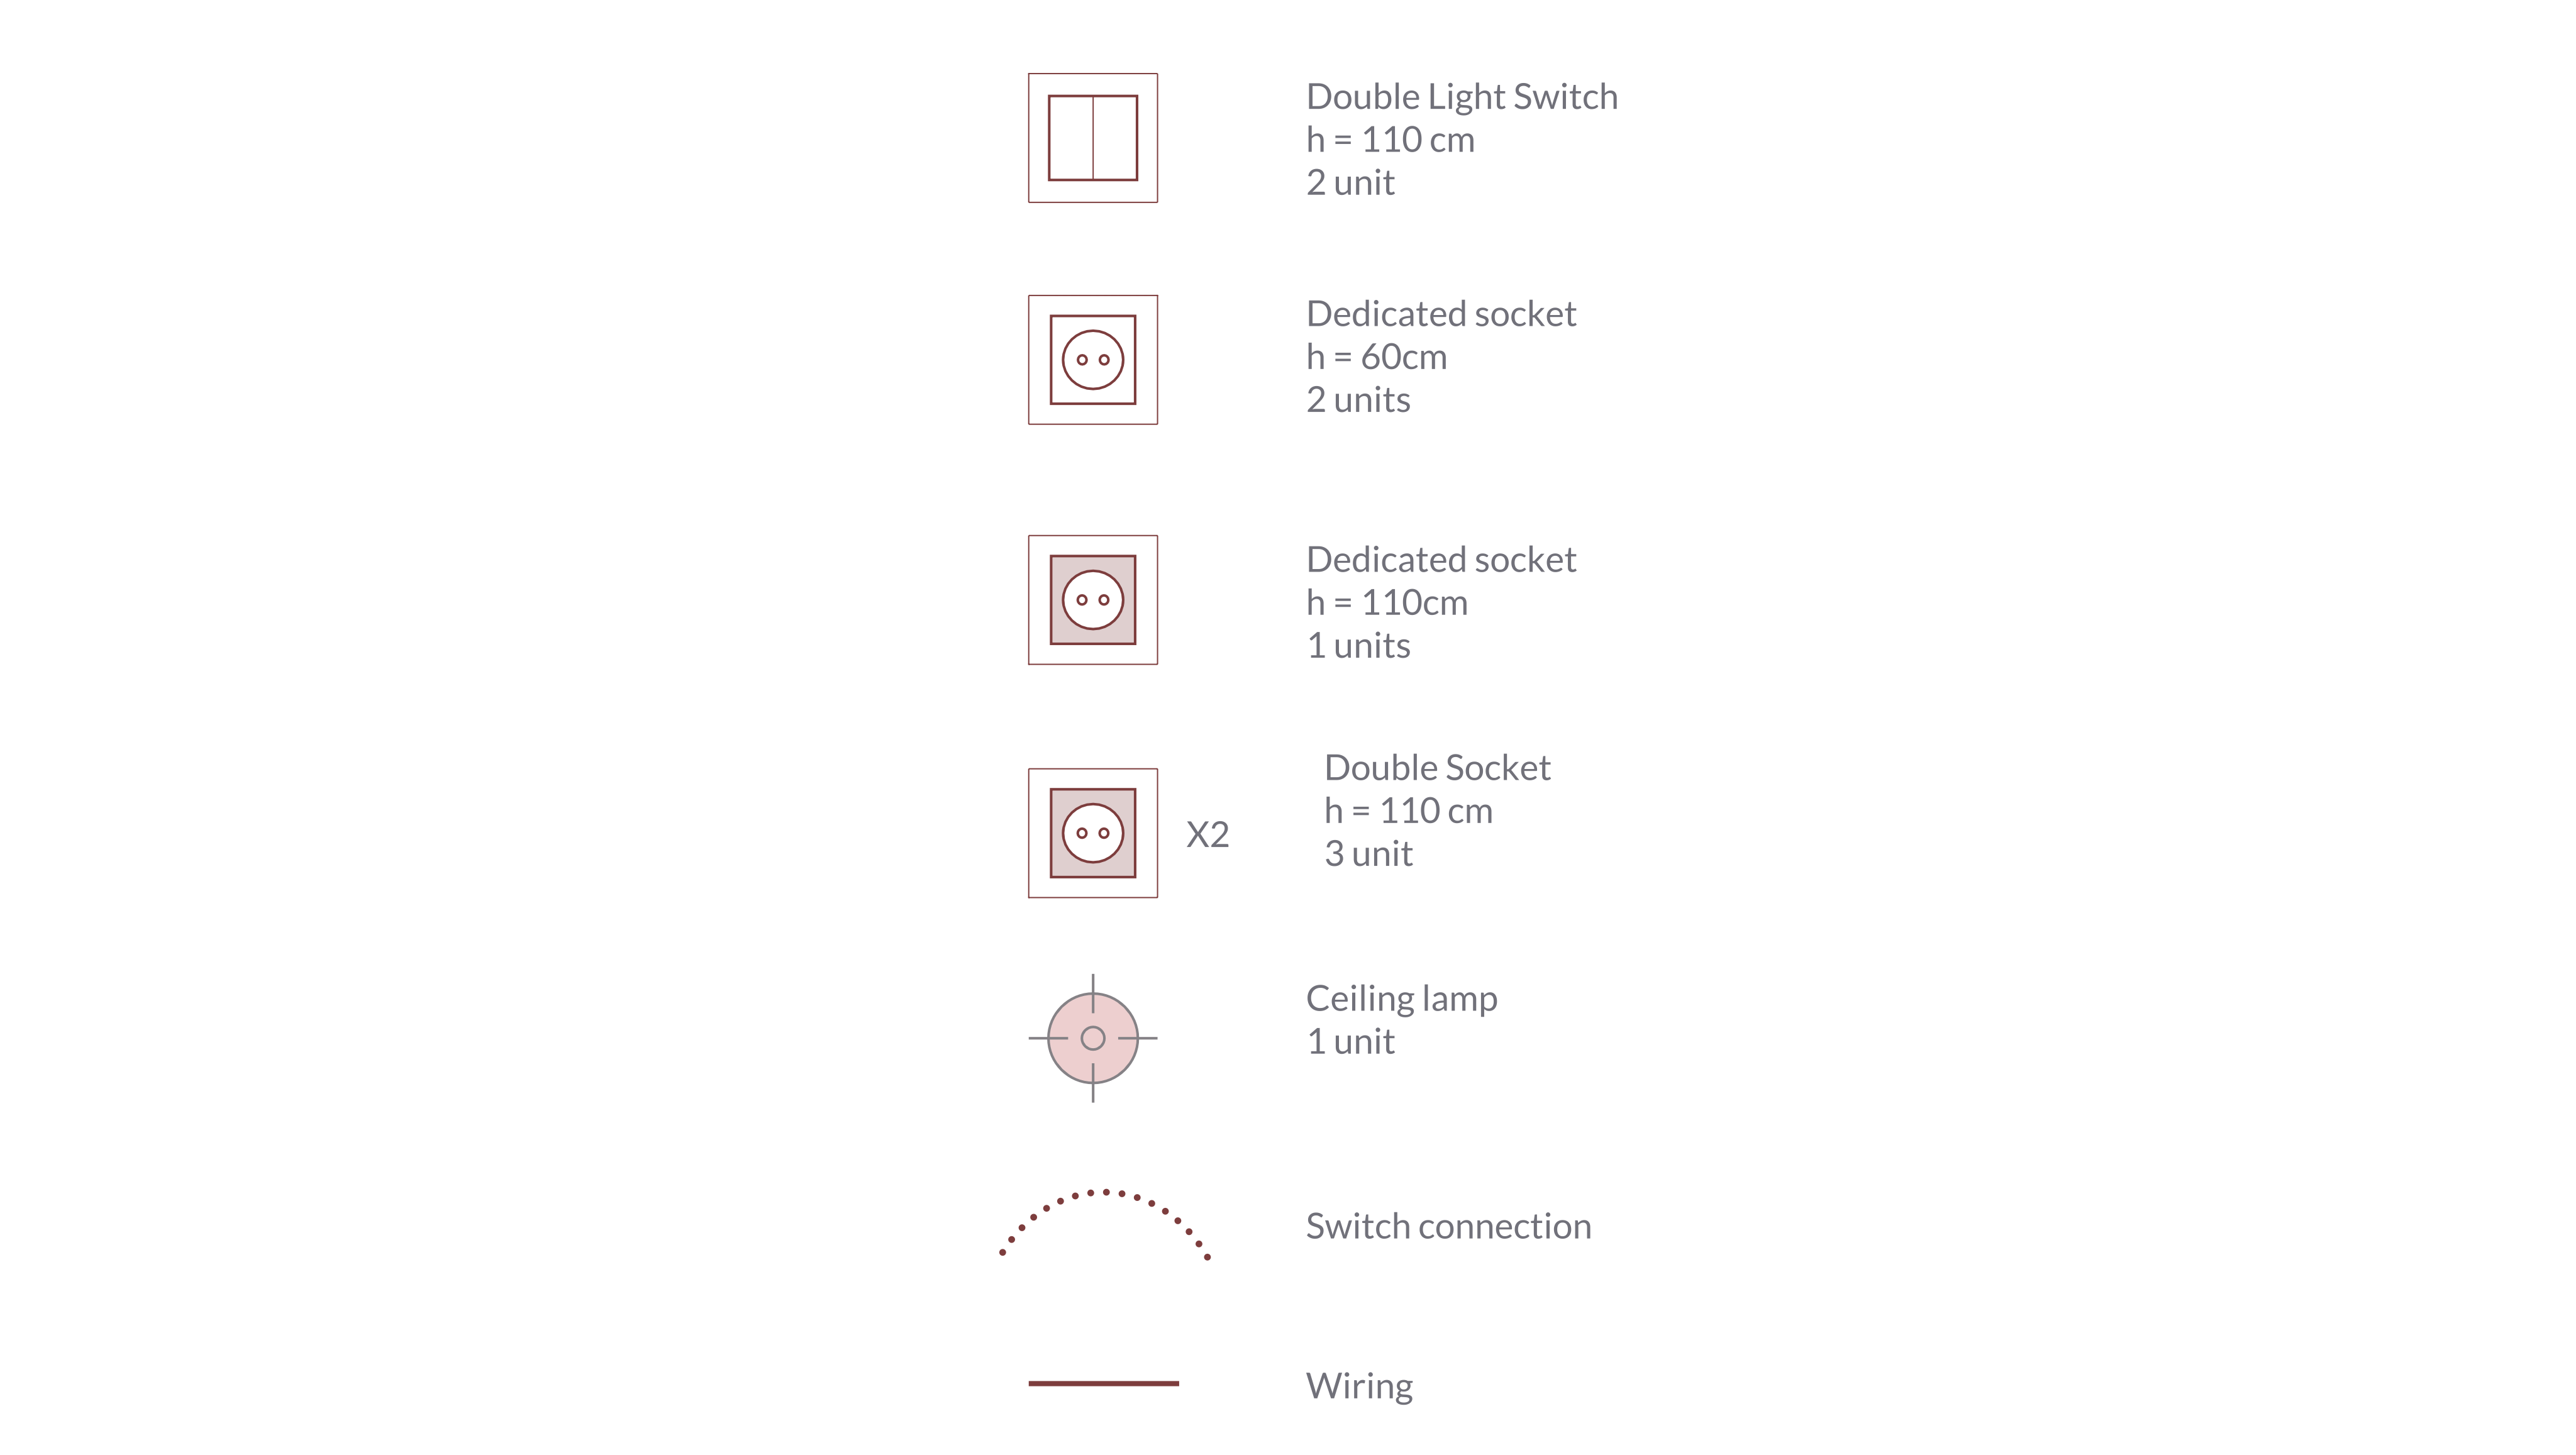
These templates include symbols for outlets, switches, fixtures, and wiring paths, making it easy to get started with your electrical planning. Download and customize them to fit your project’s specific needs, and streamline the process of creating a professional electrical plan.
Conclusion
Creating a well-structured electrical plan is essential for ensuring the safety, functionality, and convenience of any space. By carefully positioning outlets, switches, and circuits, you can optimize the room’s electrical layout for daily use and future needs. With our step-by-step guide and free templates, you’ll have everything you need to create a professional electrical plan that aligns with your design vision.
Whether you’re planning an efficient kitchen or a comfortable living room, these templates offer a solid foundation for a complete and effective electrical layout. Dive into your project with confidence and make the most of your space’s electrical potential.

